
This Entra ID blog post will explain how to create a custom extension attribute in Entra ID, similar to the classic Extension Attributes in the Windows Server Active Directory.
Table of contents
Listen to this article
What Are Extention Attributes
At CPI, we help many organisations integrate their Entra ID identity and access infrastructure with third-party applications like Wiz, WordDay, and more.
Extension attributes allow organisations to automate processes and workflow by tagging users, groups, and applications with custom attributes not available in Entra ID by default. An attribute can be a Department, Location, Manager Name, Start day, etc.
In Windows Server Active Directory, Microsoft made available 15 extensions (Extenssionattribute1-15) that allow organisations to use custom attributes.
Create a Custom Extension Attribute Entra ID
In Entra ID, the process of creating Extension Attributes differs significantly from that of Windows Server AD. To create a custom extension attribute, we first need to create an app registration that will hold the extension.
To tag a user with an extension, we need to use Graph API (Explorer or PowerShell) to add the extension to a user.
Create an App Registration
To start the process, create an App Registration using the default configuration from the Entra ID portal.
After creating the App registration, note the App registration name and Open Graph Explorer.
Create Extension Attributes (Graph Explorer)
To create an Extension attribute, open Graph Explorer with a user with Global Administrator permissions.
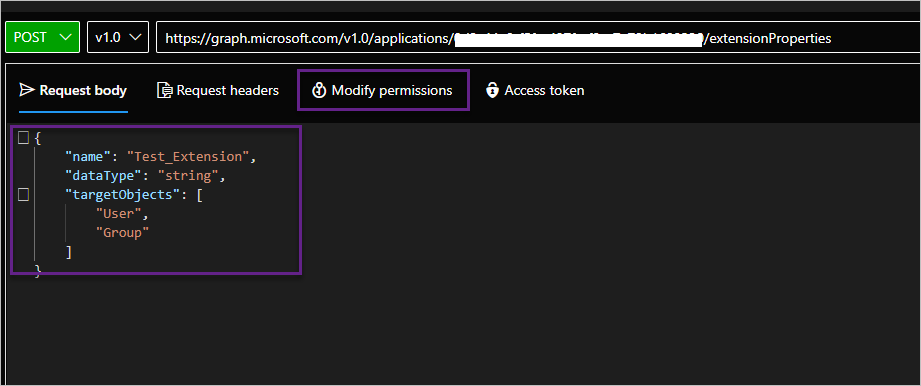
Create a POST Request using the following URL. Make sure you add the App Registration Application Client ID to the URL.
https://graph.microsoft.com/v1.0/applications/APPLICATION CLIENT ID extensionPropertiesIn the request post, you can set the name of the extension in a JSON format file as shown below.
{
    "name": "Test_Extension",
    "dataType": "string",
    "targetObjects": [
        "User",
        "Group"
    ]
}
Below you can see the screenshot of Graph API with the request to create an Extension attribute.
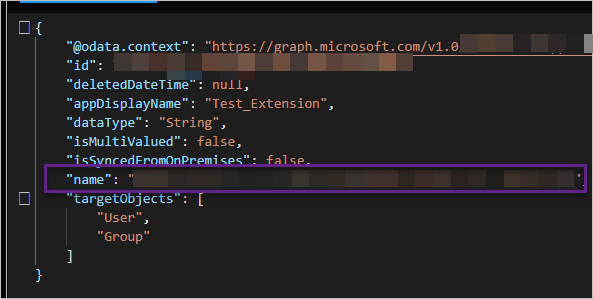
After running the request, ensure you get a return code 200. Note the extension name from the Response Preview panel, as shown below.
Assigning Extension Attribute to a User
After creating the extension attribute, we can assign it to a user using Graph Explorer, but this time, we will use a PATCH request and the following URL.
https://graph.microsoft.com/v1.0/users/USER_UPNIn the Request Body, use the following JSON with the extension’s name and add your value. In our case, Test1 is the value.
{
    "extension_COPY_YOUREXTENSION_NAME_Test_Extension": "Test1"
}
Check a User Extension
To check if the extension has been applied to a user, create a GET request with the user’s UPN and the extension’s name, as shown below.
https://graph.microsoft.com/v1.0/users/UPN?$select=displayName,extension_name_from_output Summary
In this Entra ID post, we have shown you how to create an extension attribute Graph API.
Trackbacks/Pingbacks