
This Microsoft Azure Web App article will show the process and requirements for creating custom error pages in Azure Web App.
As Microsoft Azure partners and consultants, we help customers design and deploy .NET applications to Microsoft Azure. In enterprise applications, Error pages are critical components of web development.
The purpose of error pages is to inform users when something goes wrong and act as a simple but effective communication tool.
The most common error pages are 404 (Page not found), 500 (Internal server error) and 403 (Forbidden). The 403 Forbidden error page is the most common and indicates the user is not authorised to access the resource.
Creating Custom Error Pages in Azure Web App
Azure App Services and Web Apps allow us to configure custom error pages. By custom, I mean that we can upload a custom HTML page containing a customized error message. We recommend that all our clients create a custom HTML page with specific instructions on the error and instructions on how to contact support.
Requirements
To use error pages with Azure Web App, the Web App needs to use a Premium App Service Plan. If a Web App doesn’t run on a Premium plan, you will see the following error message when you try to enable the service.

First, create an HTML page to create a custom error page (below is an example of 404 error page).
<!DOCTYPE html>
<html lang="en">
<head>
    <meta charset="UTF-8">
    <meta name="viewport" content="width=device-width, initial-scale=1.0">
    <title>403 Forbidden</title>
    <style>
        body {
            display: flex;
            justify-content: center;
            align-items: center;
            height: 100vh;
            margin: 0;
            font-family: Arial, sans-serif;
            background-color: #f8f8f8;
            color: #333;
        }
        .container {
            text-align: center;
        }
        h1 {
            font-size: 3em;
            margin: 0.5em 0;
        }
        p {
            font-size: 1.2em;
        }
        a {
            color: #007BFF;
            text-decoration: none;
        }
        a:hover {
            text-decoration: underline;
        }
    </style>
</head>
<body>
    <div class="container">
        <h1>403 Forbidden</h1>
        <p>You don't have permission to access this page.</p>
        <p><a href="/">Return to Homepage</a></p>
    </div>
</body>
</html>
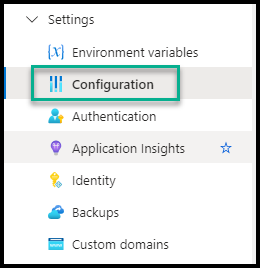
To apply the page, Open the Azure Web App. Enable the service and click on Configuration.
From the Configuration page, Click on the Error Pages tab.
Next to the error page number, click the Edit icon to upload the HTML page.

Test Your Custom Error Page
To ensure that the setup is working correctly, try to access a restricted area of your web application. You should see your custom 403 error page.
Please contact us if you need assistance designing an enterprise-grade Azure Web App.


Trackbacks/Pingbacks